
Code view
The code view is where you review what an agent changed. It shows diffs and files of the session’s worktree in code tabs, lets you edit and save them on the host, and connects to Claude Code the way VS Code does.
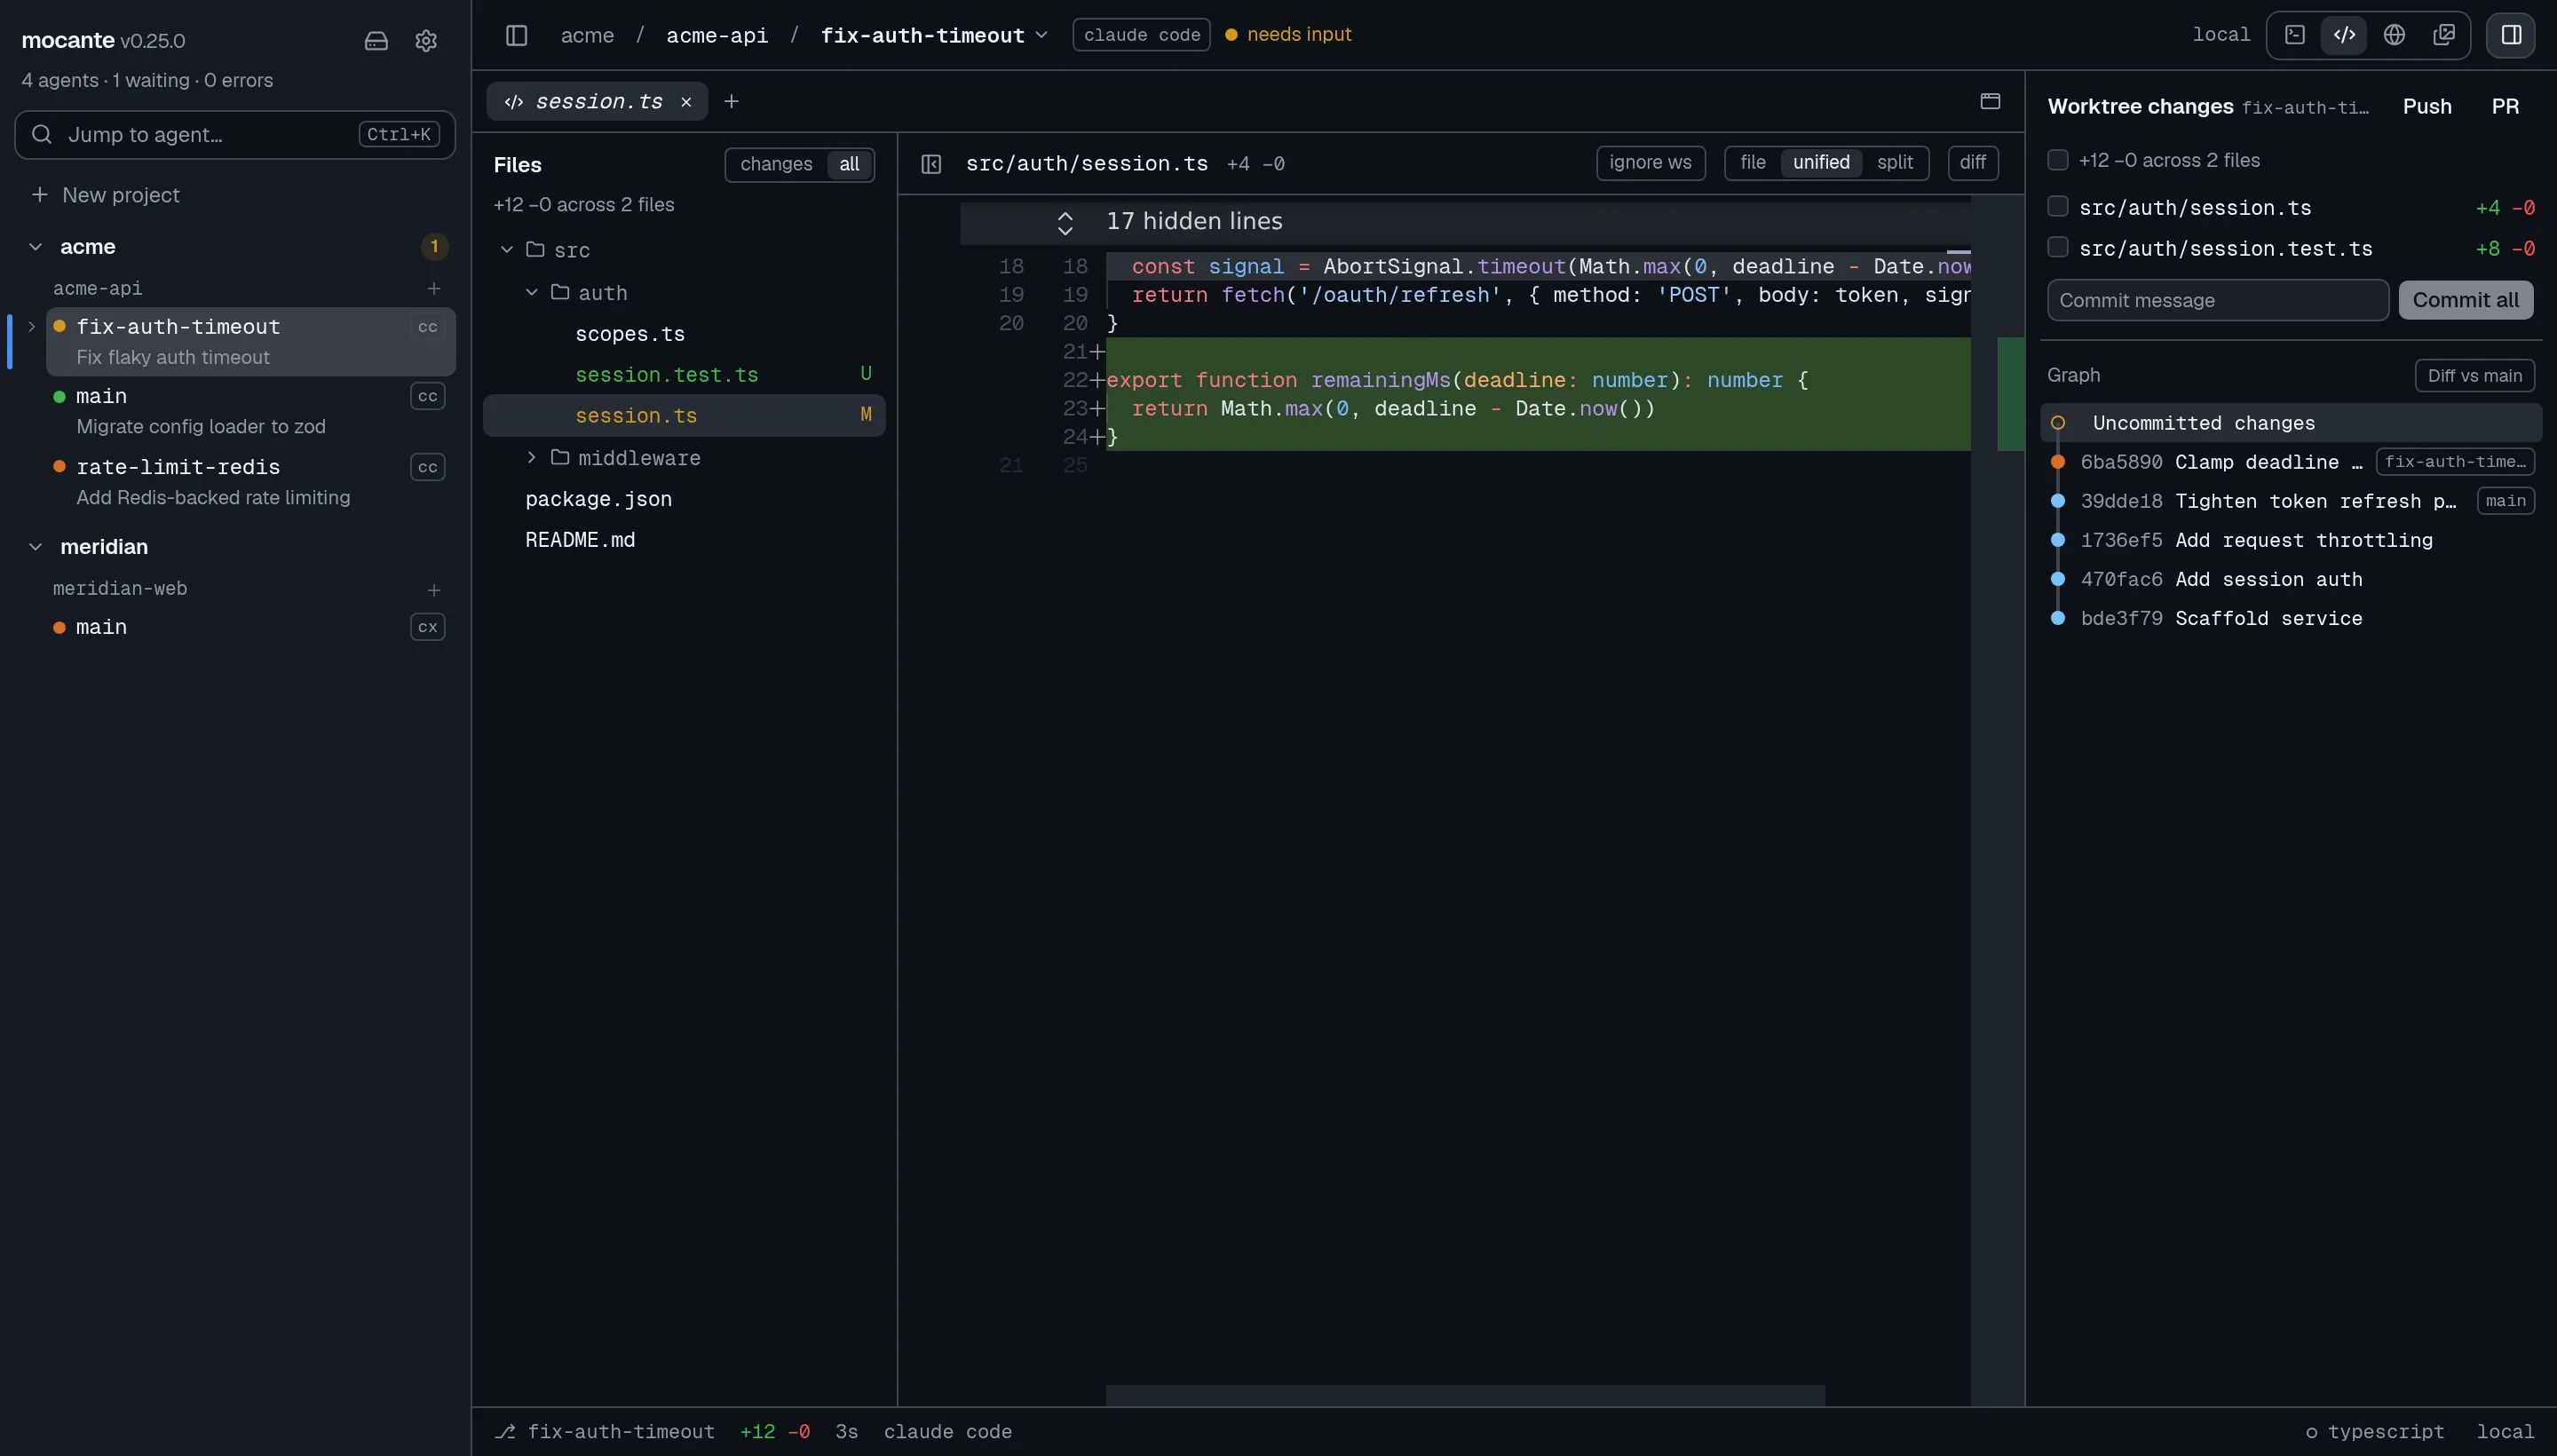
Open the code view
Section titled “Open the code view”The code view lives in the code pane, beside the terminal or on its own. See panes for the layout.
- Press
⌘⇧E(Ctrl+Shift+Eon Linux and Windows) to show or hide the code pane. - Select a file or commit in the git panel to open it in a code tab.
- Run Browse worktree files from the palette to open the file browser.
Code tabs work like terminal tabs while the code pane holds the keyboard: ⌘T opens a worktree browser, ⌘W closes the tab, ⌘1 to ⌘9 and ⌘⇧[ / ⌘⇧] move between tabs. On Linux and Windows use Ctrl for ⌘.
A tab you open with a single click is a preview, with its name in italics. The next file you open replaces it. Double-click the file or the tab, or choose Keep open from the tab’s menu, to keep it.
Read a diff
Section titled “Read a diff”A changed file opens as a diff. The toolbar switches between three layouts:
- file shows the file itself.
- unified shows removed and added lines in one column.
- split shows the old and the new file side by side.
ignore ws hides changes that only touch whitespace.
The same choices are in the tab’s context menu as Show file, Unified diff, Side-by-side diff and Ignore whitespace.
Diffs of a commit or a branch
Section titled “Diffs of a commit or a branch”Select a commit in the git panel to diff its files against its parent. Shift-click a second commit to diff the whole range. Diff vs main in the git panel, or Open branch diff in the palette, diffs the whole branch against the point where it left the base branch.
A bar above the file names the commit or the range. Select × working tree in that bar to go back to the uncommitted changes. Files shown at a commit are read-only.
Browse files
Section titled “Browse files”The Files tree beside the editor has two filters:
- changes lists only the changed files.
- all lists the whole worktree.
The choice is kept across tabs and restarts. The panel button at the left of the toolbar, or Hide file tree in the palette, hides the tree to give the editor the full width.
To open any file by name, press ⌘P (Ctrl+P) while the code pane is shown, or type / in the command palette.
Edit and save
Section titled “Edit and save”Worktree files are editable in every layout. Press ⌘S (Ctrl+S) to write the file back to the host. Until you save, the tab shows a dot and the toolbar shows ● unsaved. Unsaved edits stay with the tab when you switch layout, change tabs or go back to the terminal. mocante asks before closing a tab or window with unsaved edits.
A file that is too large to load whole shows truncated · read-only.
Find and replace
Section titled “Find and replace”| Action | macOS | Linux and Windows | Command |
|---|---|---|---|
| Find | ⌘F |
Ctrl+F |
Find in file |
| Replace | ⌥⌘F |
Ctrl+H |
Replace in file |
| Find in files | ⌘⇧F |
Ctrl+Shift+F |
Find in files… |
| Replace in files | ⌥⌘⇧F |
Ctrl+Shift+H |
Replace in files… |
Find and replace in a file work only while the code pane has the keyboard, because the terminal uses Ctrl+F and Ctrl+H itself. Find and replace in files work from anywhere and open the code pane. The palette reaches all four.
In one file
Section titled “In one file”The find widget supports regular expressions, case matching, whole words and searching inside a selection. Replace is not available where the file is read-only: a file at a commit, a truncated file, or a change an agent proposes.
Across the worktree
Section titled “Across the worktree”Find in files… replaces the file tree with a Search panel. The search runs on the host with git grep. It reads tracked and untracked files and skips ignored and binary files.
- Results group by file. Select a group to fold it. The button beside the result count folds or unfolds all groups.
- Select a result to open the file at that line.
- The filter button opens Files to include and Files to exclude. Each takes comma-separated patterns such as
src/**/*.ts, *.md. A bare*.tsmatches at any depth. - The panel keeps its query per session. Select the back button to return to the file tree; that also clears the query.
Replace all rewrites every listed file on the host, then searches again to show what is left. With a regular expression, $1 and so on insert captured groups.
Go to definition
Section titled “Go to definition”The code view asks a language server for:
- Go to definition:
F12or⌘-click (Ctrl-click). - Peek definition.
- Find references:
⇧F12. - Hover information.
- Go to symbol:
⌘⇧O(Ctrl+Shift+O).
The server runs on the host where the worktree lives, so it sees the same files, dependencies and toolchain as the agents.
Install a language server
Section titled “Install a language server”mocante does not install language servers. Install the one you need on the host, either in the project or on the PATH of your login shell:
| Files | Server |
|---|---|
.ts .tsx .js .jsx .mts .cts .mjs .cjs |
TypeScript 7 in the project, or typescript-language-server |
.go |
gopls |
.rs |
rust-analyzer |
.py |
basedpyright-langserver or pyright-langserver |
.c .h .cc .cpp .cxx .hh .hpp |
clangd |
mocante looks first in the project’s node_modules/.bin, .venv/bin and venv/bin, so a version the project pins wins. Then it looks on the PATH your login shell sets up, so tools installed through mise, Homebrew, go or cargo are found, also over ssh. When no server is found, go to definition tells you what to install.
The first request can be slow while the server indexes the project.
Check or restart servers
Section titled “Check or restart servers”In the code view, the session’s status bar names the language server for the file on screen, with a dot for its state. Select it to list every server for that host: running ones with their project and uptime, failed ones with the reason, and ones not started or not installed. Select a row to restart that server, or use Restart all. The palette has Restart language servers.
Limits
Section titled “Limits”- Error squiggles and completion are not supported.
- Files at a commit and files over 2 MB get no answers.
- A result outside the worktree, such as a standard library file, opens only as a peek.
Use Claude Code with the code view
Section titled “Use Claude Code with the code view”The code view does for Claude Code what the VS Code and JetBrains extensions do. Each session has its own connection, so Claude Code sees the code view of its own session only.
- Selection. Select lines in the code view. Claude Code shows
Selected N lines from <file>under its prompt and sends the lines with your next message. The status bar shows⇄ claudewhile Claude Code is connected. - Proposed edits. When Claude Code asks to edit a file, the edit opens as a code tab marked
proposed. Select Accept (or Create file for a new file) to write it, or Reject. Closing the tab also rejects it. If you answer in the terminal instead, the tab closes. A proposal for a session that is not on screen shows a notice with a Show button. - Open file. Claude Code can open a file in the code view and select a passage.
Connect Claude Code
Section titled “Connect Claude Code”In a session that mocante created, Claude Code connects on its own when you start it. In a session you adopted, or after you rename a session, run /ide in Claude Code and pick the entry named mocante: <session>.
Send a selection to any agent
Section titled “Send a selection to any agent”Select lines and run Send selection to agent from the palette or the tab’s menu. The lines go to the session’s agent as an @file#a-b mention. With Claude Code connected they go through the connection; otherwise mocante types the mention into the terminal, which works with any agent that reads file references.
Open the file in your editor
Section titled “Open the file in your editor”Select the button at the right of the code toolbar, run Open in VS Code from the palette, or use the tab’s context menu. The file opens in your editor on your device at the line where the cursor is, with the worktree as the window’s folder. The command is named after the editor you choose.
Choose the editor in Settings → Editor → Open in: VS Code, VS Code Insiders, Cursor, Windsurf or VSCodium.
For a file on a remote host, the editor connects to the host with its own Remote-SSH extension, using the ssh config on your device. The editor asks for its own credentials.
This action is only in the desktop app, not in the browser.
Related
Section titled “Related”- Git workflow for staging, committing and pull requests.
- Keyboard shortcuts for every chord.