
Your first session
This tutorial takes you from an empty sidebar to an agent that runs in its own session. It uses a git repository on your own machine. The steps are the same for a remote host; you only pick a different host.
Before you start, install mocante and make sure tmux and git are on your machine. Have a git repository cloned somewhere, for example ~/work/acme/api.
Create a project
Section titled “Create a project”A project groups the work for one client or product. It exists only in mocante; it creates nothing on disk.
-
Click New project in the sidebar.
-
Fill in the dialog:
- Project name: a name you recognize, such as
Acme. - Directory: the folder that holds this project’s repositories, such as
~/work/acme. mocante uses it to fill in workspace paths for you. You can leave it empty. - Default host: the machine new workspaces go on. Keep your own machine for now.
- Tags: leave empty. See links for what tags do.
- Project name: a name you recognize, such as
-
Click Create project. The project page opens.
Add a workspace
Section titled “Add a workspace”A workspace is one directory on one host, usually a git checkout.
-
On the project page, click Add workspace.
-
In Path, type the path to your repository, such as
~/work/acme/api. The field suggests directories that exist on the host as you type.When the path is a git checkout, mocante fills in Name and Source from it and shows “Existing git checkout. It becomes the workspace as it is.”
-
Check that Host is your machine.
-
Click Add workspace. The workspace page opens.
Start a session
Section titled “Start a session”A session is a tmux session. On a git workspace, each session works in its own worktree on its own branch, so several agents can work on the same repository at once without touching each other’s files.
-
Click New session on the workspace page, or the
+next to the workspace in the sidebar. -
In Branch, PR or issue, type a name for a new branch, such as
feat/login, and pick Create branch “feat/login”. You can also pick an existing branch, or an open pull request or issue if the GitHub CLIghis signed in. -
In Base, pick the branch the new branch starts from. For an existing branch or a pull request, the base is fixed.
-
Click Start session.
mocante creates a worktree for the branch, starts a tmux session in it, and opens the terminal with a shell tab. If you pick the repository’s main branch, the session runs in the checkout itself and no worktree is made.
On a workspace that is not a git repository, the dialog asks only for a Name.
Run an agent
Section titled “Run an agent”-
In the shell tab, start your agent as you always do, for example:
Terminal window claude -
Watch the tab. mocante recognizes the agent from the running process and the screen, and the tab shows the agent and its status: working, needs input, error, completed or idle.
-
Give the agent a task.
You do not pick an agent in mocante. Claude Code, Codex, opencode and pi are detected in any tab. Press ⌘T (Ctrl+T on Linux) to open another shell tab in the same session.
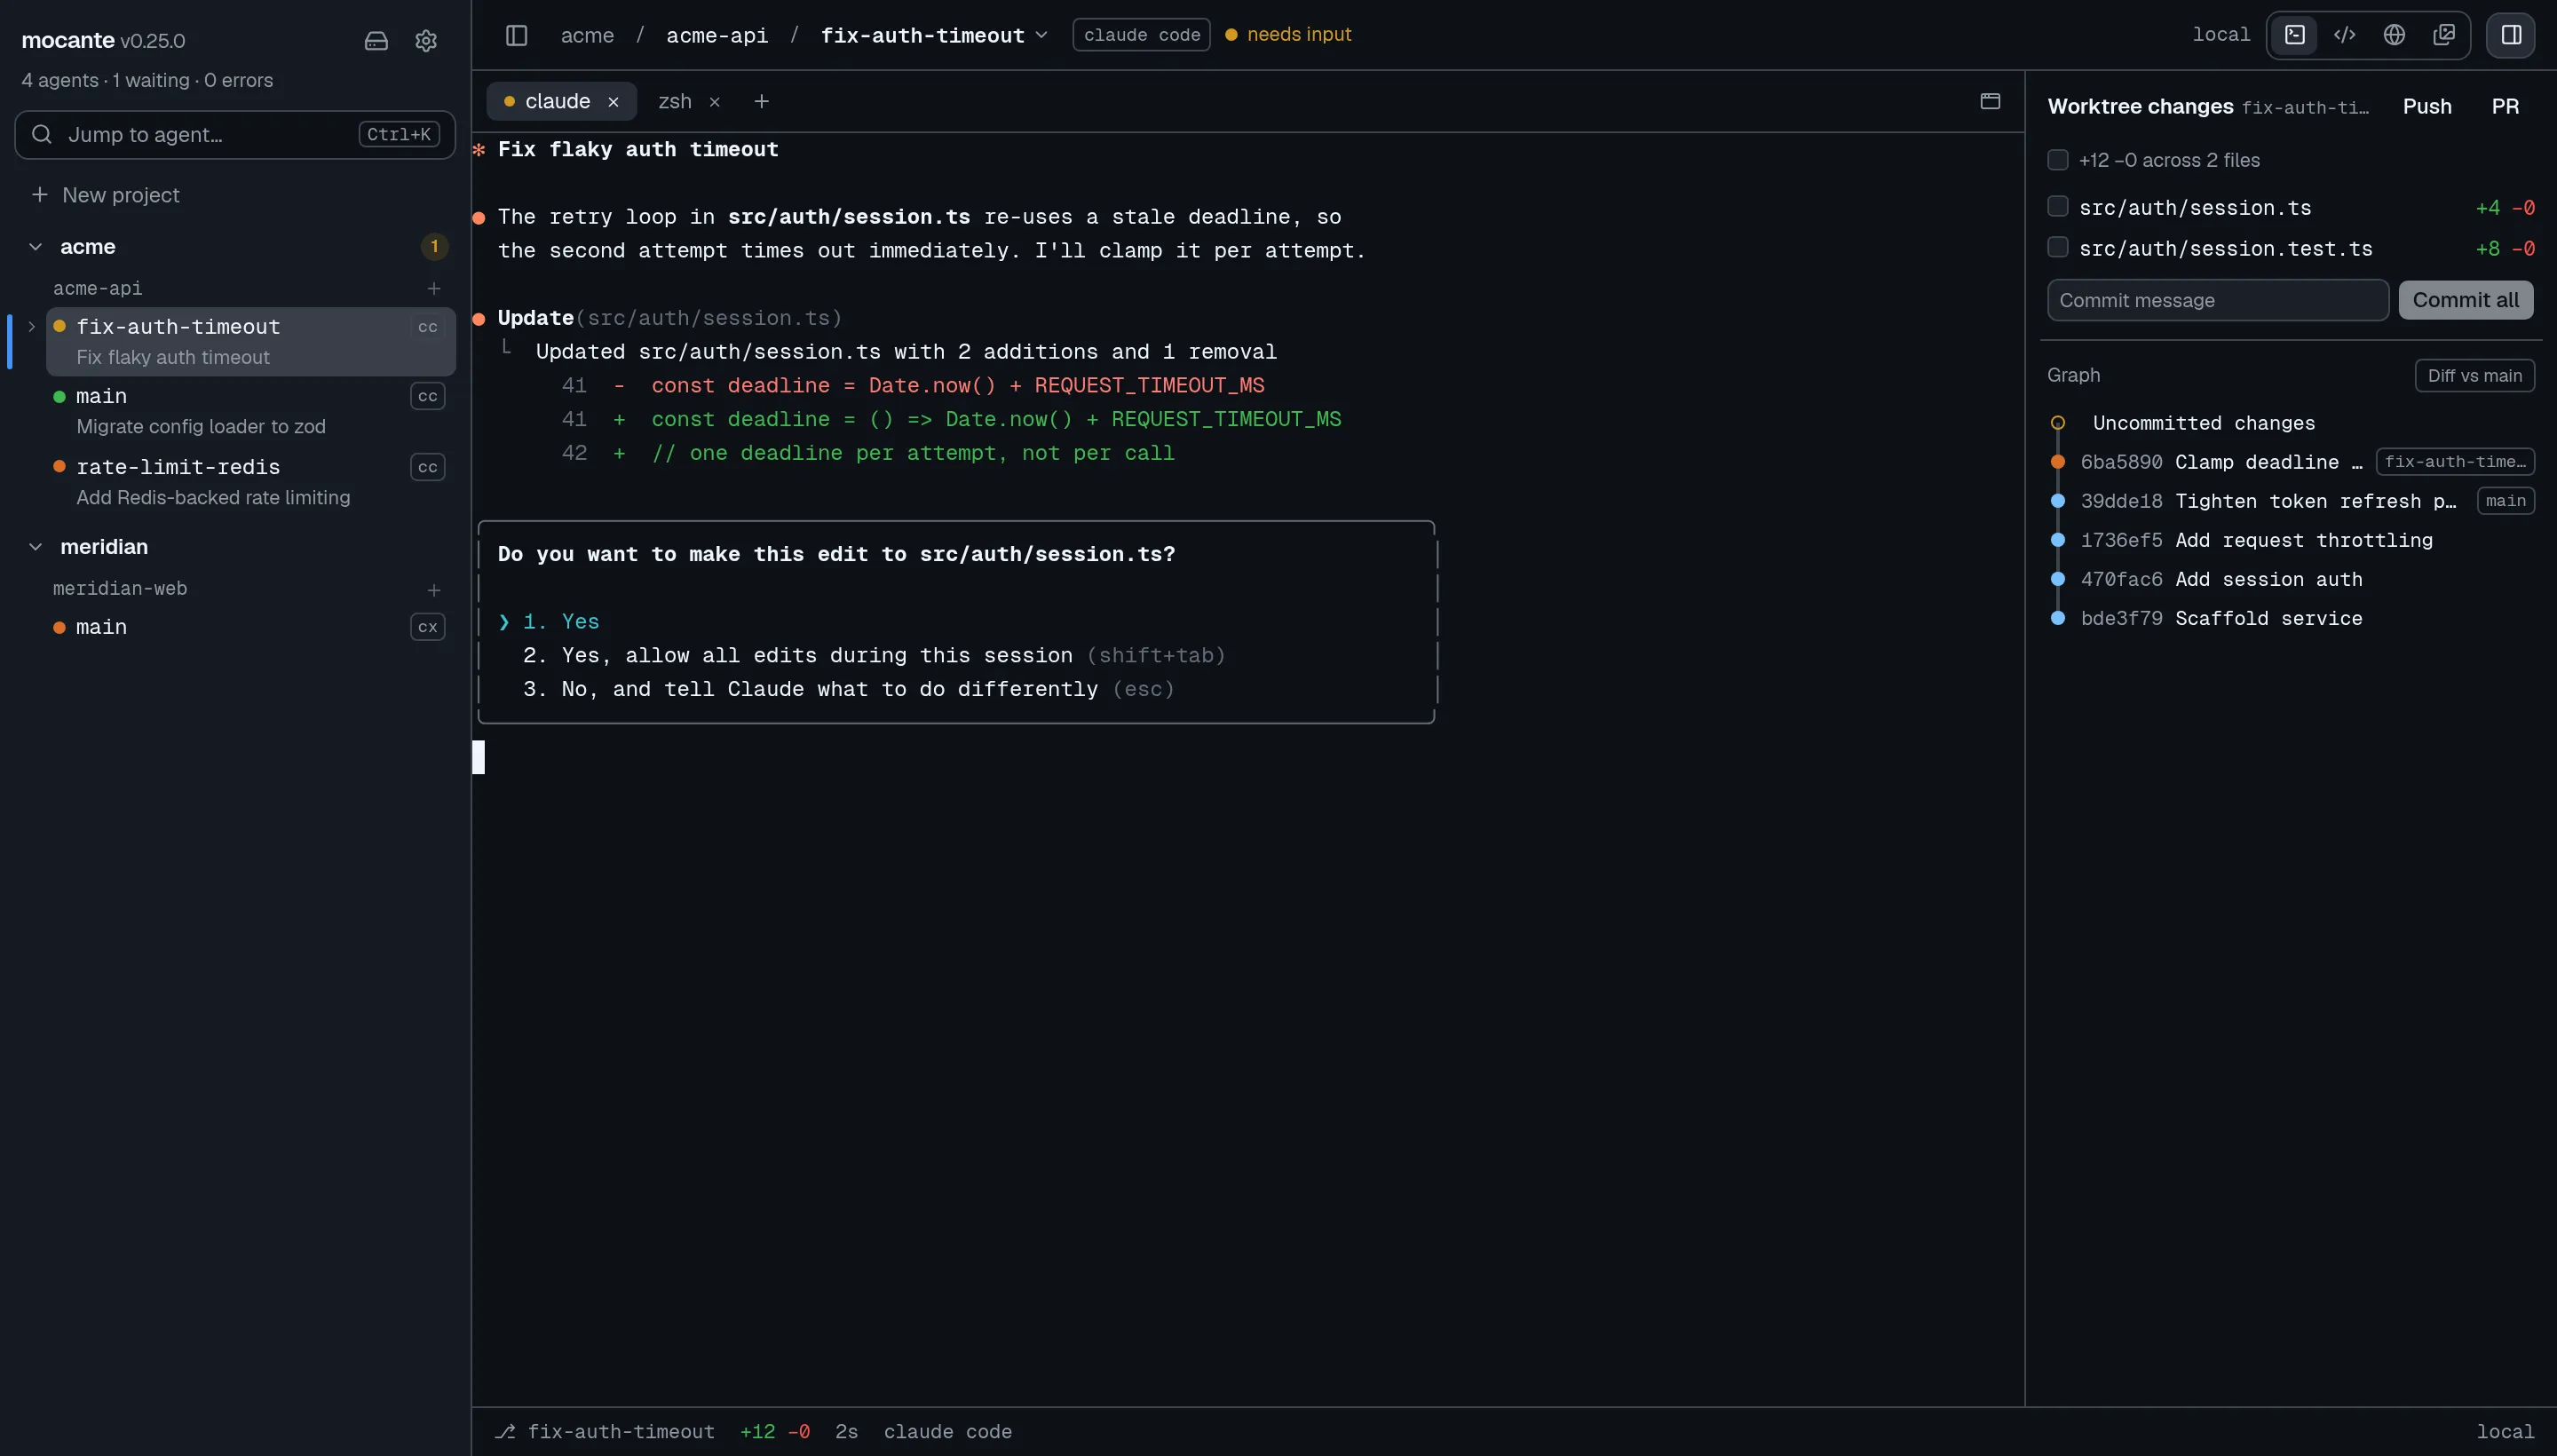
Get exact status with hooks
Section titled “Get exact status with hooks”Detection reads the screen, so now and then it can guess wrong. Hooks let the agent report its own status, which is exact and immediate. For Claude Code and Codex, hooks also let you approve a tool call from the desktop notification.
-
Press
⌘K(Ctrl+Kon Linux) to open the command palette. -
Run Install agent hooks… and pick your agent and host.
-
Restart the agent. An agent reads its hook configuration only when it starts.
See agents for details.
Leave it running
Section titled “Leave it running”You can switch away now. When the agent needs you, mocante shows a desktop notification; click it to go to the tab. The count at the top of the sidebar shows how many agents are waiting, and the fleet view lists them all.
The session keeps running in tmux when you quit mocante. The next time you open the app, it is where you left it.
Review the work
Section titled “Review the work”When the agent is done, open the git panel to read its changes, commit and push, or open a pull request. See git workflow and code view.
Next steps
Section titled “Next steps”- Learn the concepts behind projects, workspaces and sessions.
- Add a remote host to run agents on another machine.
- Learn the command palette to move between agents from the keyboard.